
Auto zoom only works in Entire screen mode.
Auto zoom allows you to highlight user clicks by zooming into the clicked areas. This feature works by detecting user clicks while recording and those clicked areas will be zoomed for 3 seconds in the final video. To enable this feature, follow the steps below
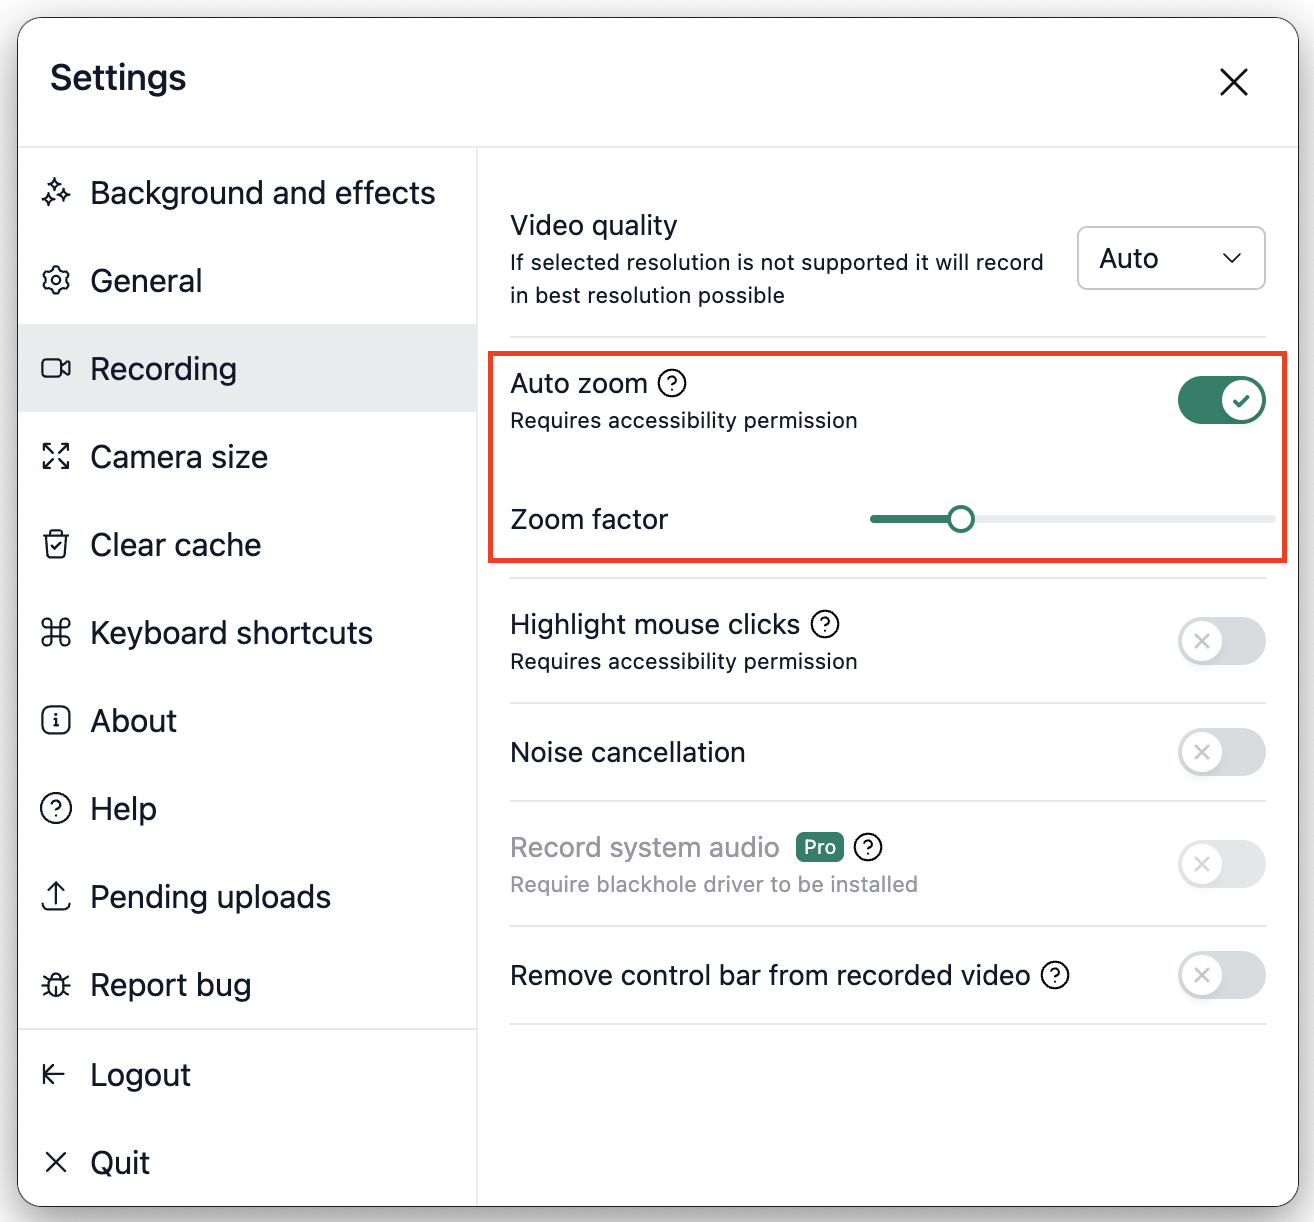
Click on Settings from the desktop app.
Click on Recording from the left sidebar.
Enable Auto zoom and set your required zoom factor which determines how much zoom you need(max zoom is 3x).
-
You can also adjust the zoom effects once the video is uploaded.
Mac users
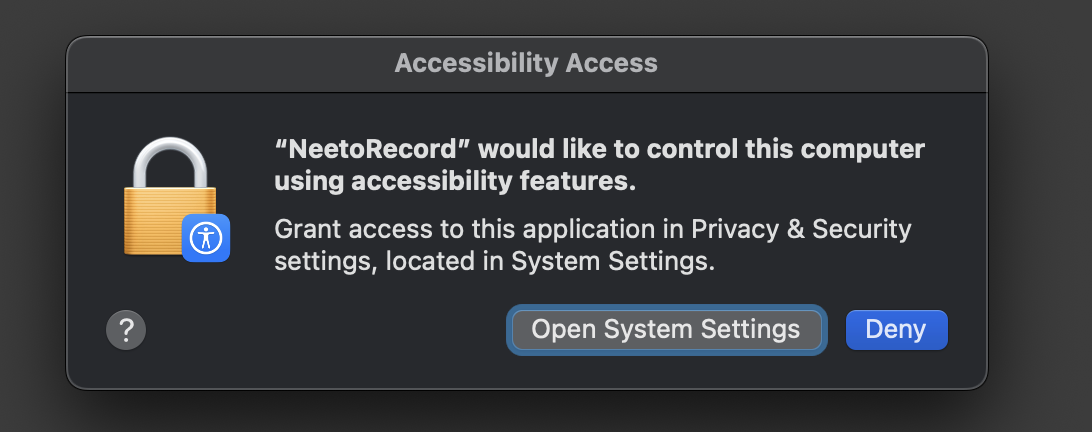
If you are using a Mac, you need to provide accessibility permission, if you haven't already. When you try to enable this feature a system dialog to allow accessibility permission will appear.
-
Click on Open system settings.
-
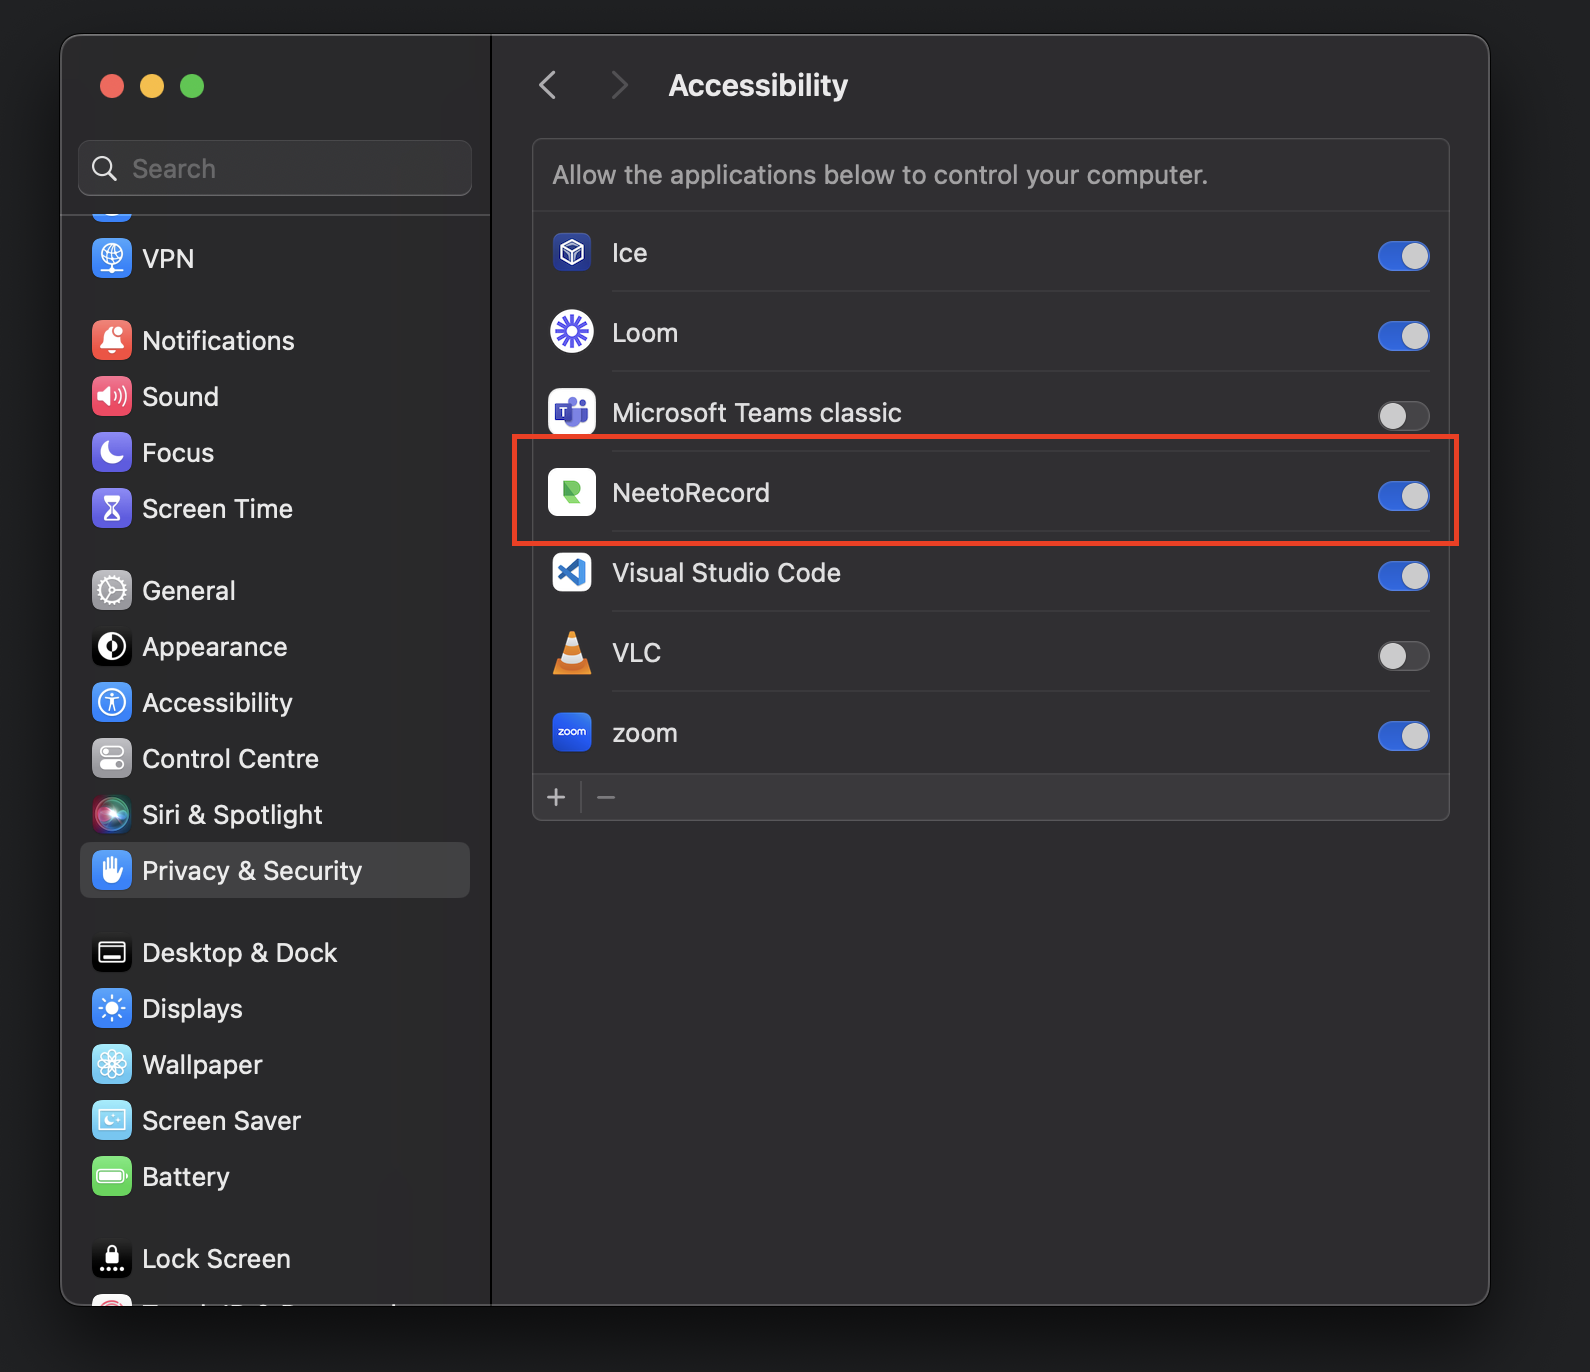
Enable Accessibility permission for NeetoRecord.
Window and Linux users
No additional permissions are required in Linux, auto zoom will work once you enable it.
Auto zoom is currently disabled in Linux wayland because of a technical limitation with electron.
How auto zoom works
Auto zoom works by detecting user clicks while recording and those clicked areas will be zoomed for 3 seconds in the final video. However there are additional logic in place to avoid unnecessary zooming.
If user moved the cursor away from the clicked area within one second, zoom event won't be created for that click.
If user has made multiple click in the same area, only one will be counted for creating zoom event.
If user click on the same area within three seconds, the zoomed time will be extended to another three seconds from the time of the second click.